
Essential Hitting Drills Every Youth Baseball Player Should Master
Walk into any batting cage across the country, and you'll witness coaches running dozens of different hitting drills—each one promising to unlock your child's potential at the plate. Scroll through social media, and you'll find an endless stream of new techniques, gadgets, and training methods that claim to revolutionize the swing. It's enough to make any parent's head spin.
Here's the truth that experienced coaches and hitting instructors understand: while hitting methodologies continue to evolve with new technology and research, the foundational drills remain remarkably consistent. These are the time-tested exercises that build muscle memory, develop proper mechanics, and create the foundation upon which all advanced skills are built. Before your young player experiments with the latest viral drill, they need to master the basics.
In this comprehensive guide, we're breaking down the essential hitting drills that every youth baseball player should know and practice regularly. These aren't flashy or complicated—they're the building blocks that have developed countless successful hitters over generations.

The Foundation: Why Basic Drills Matter Most
Before we dive into specific drills, it's important to understand why mastering the fundamentals is so critical for young hitters. Unlike advanced techniques that require precise timing and physical maturity, foundational drills focus on building the correct movement patterns that will serve your child throughout their baseball journey.
Think of hitting like building a house. You wouldn't start with the roof—you'd lay a solid foundation first. These basic drills are that foundation. They develop:
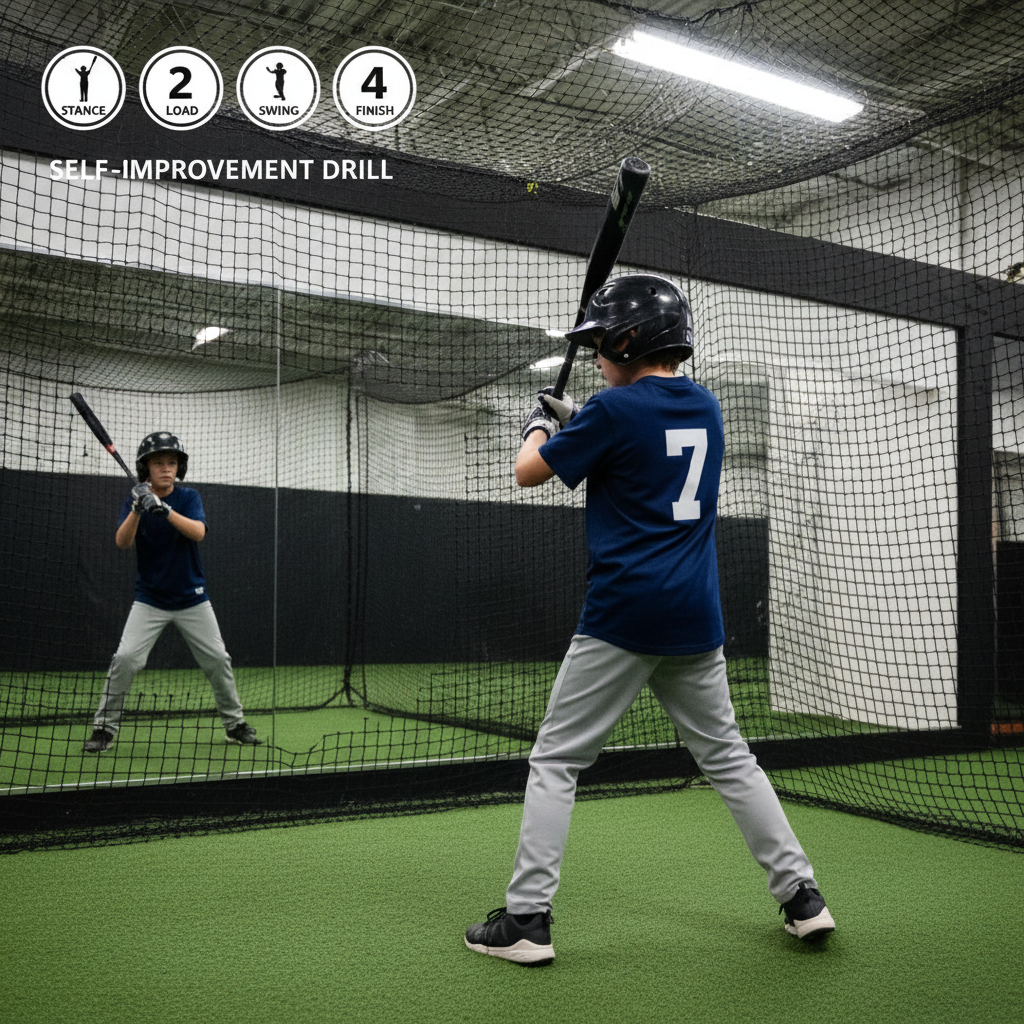
- Proper stance and balance
- Correct hand path to the ball
- Hip rotation and power generation
- Consistent contact point
- Mental focus and discipline
Now, let's explore each essential drill in detail.
Drill #1: Tee Work
The humble batting tee might be the most underrated piece of equipment in baseball. Many young players (and parents) view tee work as something for beginners only, but nothing could be further from the truth. Major League hitters use the tee daily because it allows them to isolate and perfect specific aspects of their swing without the variable of pitch timing.
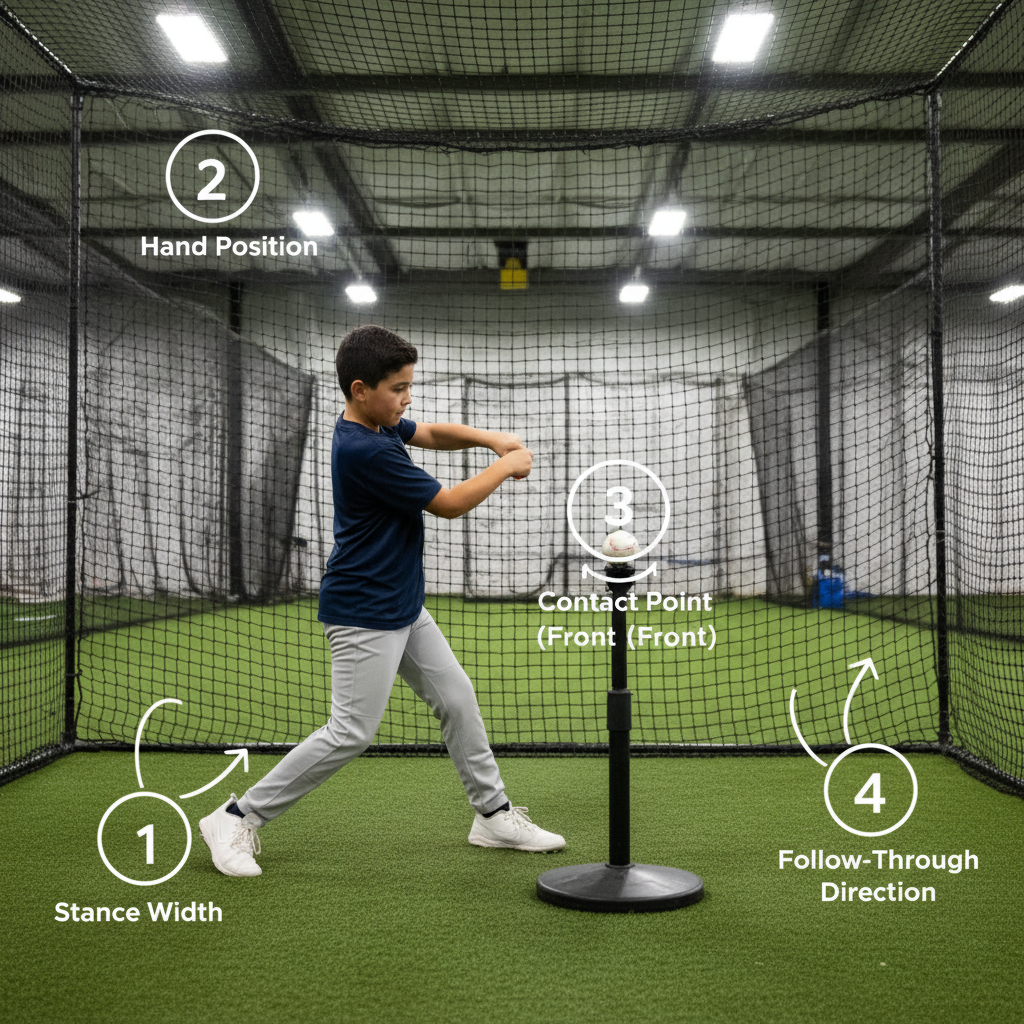
How to Perform Tee Work Correctly
Step 1: Set Up the Tee Properly Position the tee at the front of home plate, aligned with the hitter's front hip. The ball should be at the height of the hitter's belt buckle to start. Many young players make the mistake of setting the tee too far back, which creates bad habits.
Step 2: Establish Your Stance Feet should be shoulder-width apart, knees slightly bent, weight balanced on the balls of the feet. Hands should be held at shoulder height, back elbow relaxed.
Step 3: Focus on Contact Point The goal is to hit through the ball with the barrel of the bat, making contact out in front of the body. Watch the ball all the way through contact.
Step 4: Drive Through the Ball After contact, the swing should continue through the zone with full extension. Don't stop the bat at contact—finish the swing completely.
Tee Work Variations
Once your player masters the basic tee drill, try these variations:
- Inside/Outside Tee: Move the tee to different locations to practice hitting pitches in various zones
- High/Low Tee: Adjust height to practice different pitch locations
- Two-Tee Drill: Set up two tees to work on keeping hands inside the ball
Drill #2: Soft Toss
Soft toss introduces timing and tracking into the equation while still allowing the hitter to focus primarily on mechanics. This drill bridges the gap between stationary tee work and facing live pitching.
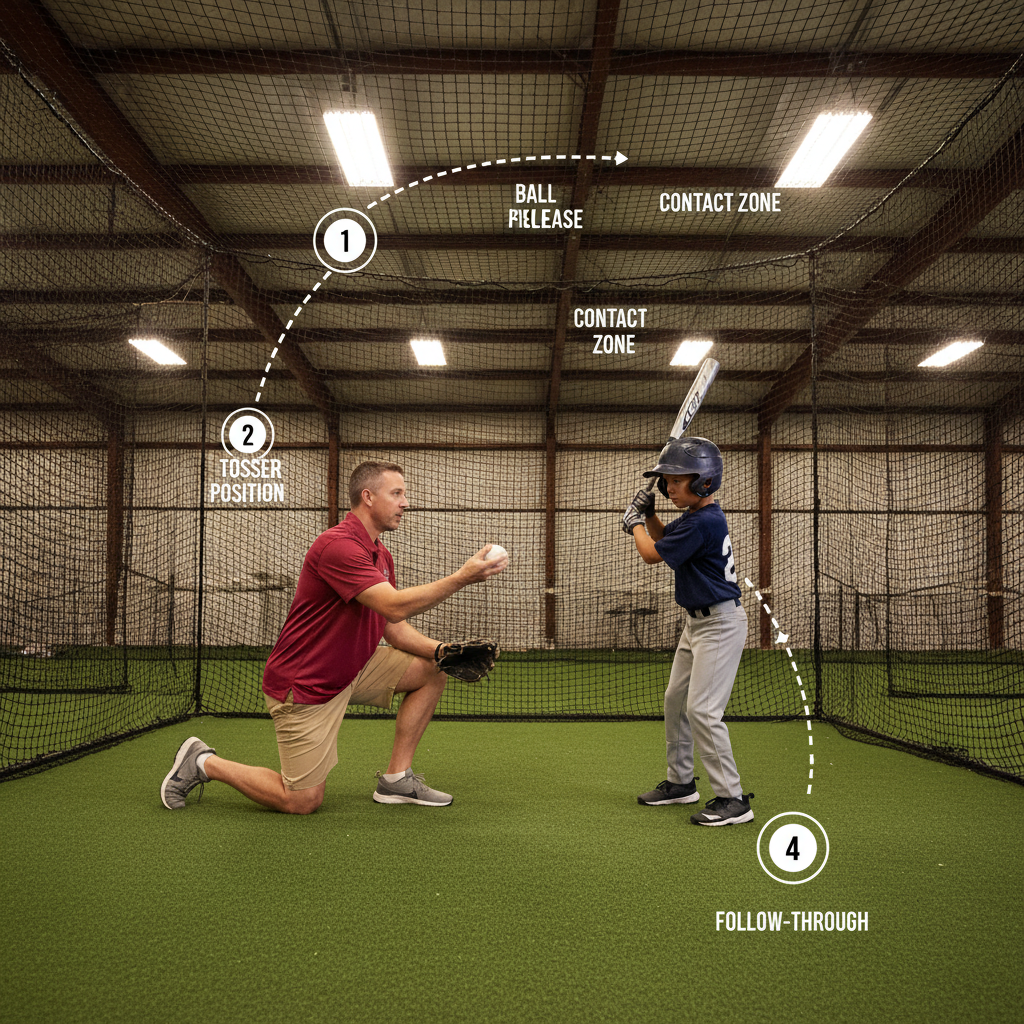
How to Perform Soft Toss Correctly
Step 1: Position the Tosser The person tossing should kneel or sit on a bucket approximately 6-8 feet away at a 45-degree angle to the hitter's front side. They should be protected by a screen if possible.
Step 2: Deliver Consistent Tosses The toss should be soft and arcing, arriving at the contact zone at a consistent height and location. Consistency is key—the tosser's job is to give the hitter a perfect pitch to drive.
Step 3: Load and Stride As the ball is tossed, the hitter should begin their load (slight weight shift back) and stride (small step toward the pitcher).
Step 4: Track and Attack Eyes should follow the ball from the tosser's hand to the contact point. The swing should be aggressive and directed back through the middle of the field.
Soft Toss Variations
- Front Soft Toss: Tosser stands in front with an L-screen for more realistic pitch angles
- Rapid Fire Soft Toss: Quick succession of tosses to build rhythm and bat speed
- Colored Ball Soft Toss: Use different colored balls and call out which color to swing at for pitch recognition
Drill #3: Front Toss (Flip Drill)
Front toss is similar to soft toss but comes from directly in front of the hitter, simulating a more realistic pitch path. This drill is excellent for developing timing and learning to let the ball travel.
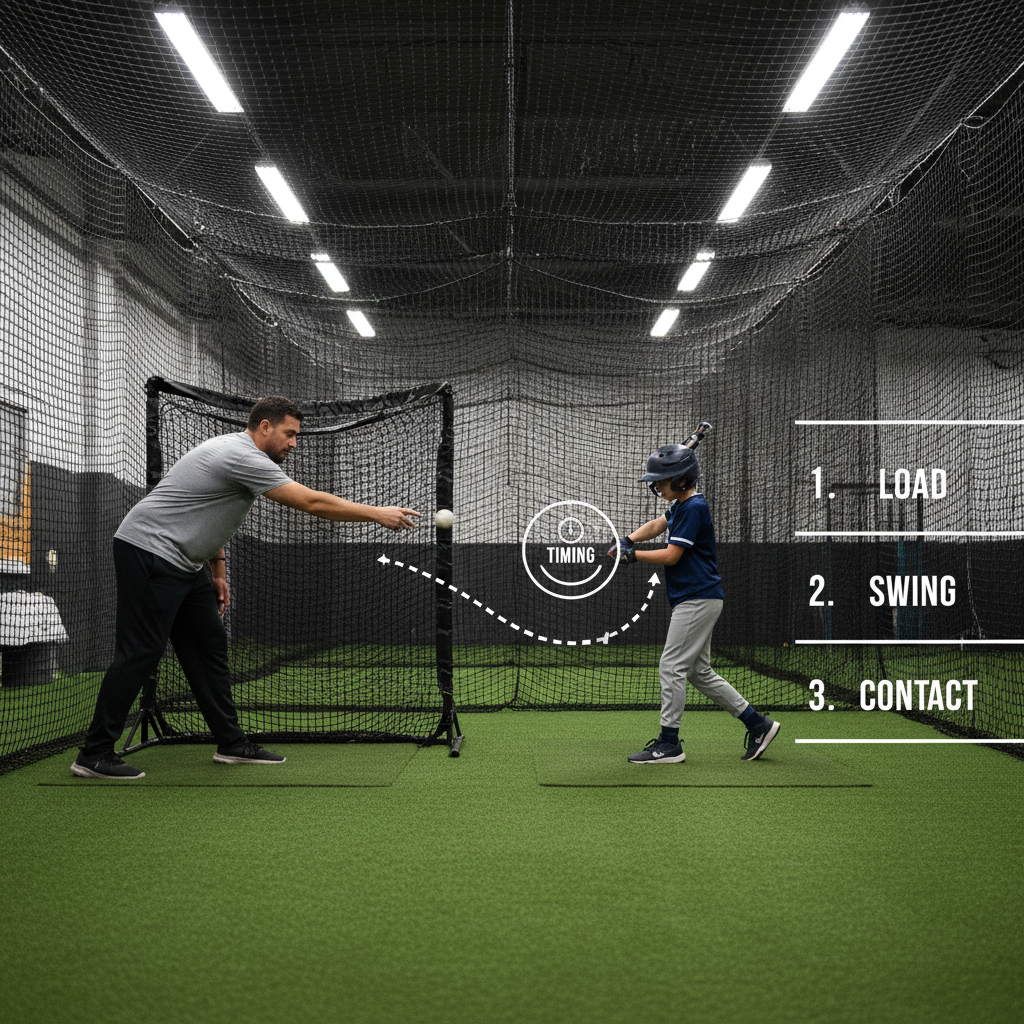
How to Perform Front Toss Correctly
Step 1: Set Up the L-Screen The tosser should stand 15-20 feet in front of the hitter, protected by an L-screen. Safety is paramount in this drill.
Step 2: Underhand Flip Deliver the ball with a smooth underhand flip, aiming for the strike zone. The ball should have a slight arc but travel on a more direct path than soft toss.
Step 3: Timing the Swing The hitter must wait longer than with soft toss, allowing the ball to travel deeper into the zone before initiating the swing.
Step 4: Drive the Ball Focus on hitting line drives back through the middle. The goal is quality contact, not maximum power.
Drill #4: One-Hand Drills
One-hand drills isolate each arm's role in the swing, helping young hitters understand how both hands work together to create a powerful, efficient swing path.
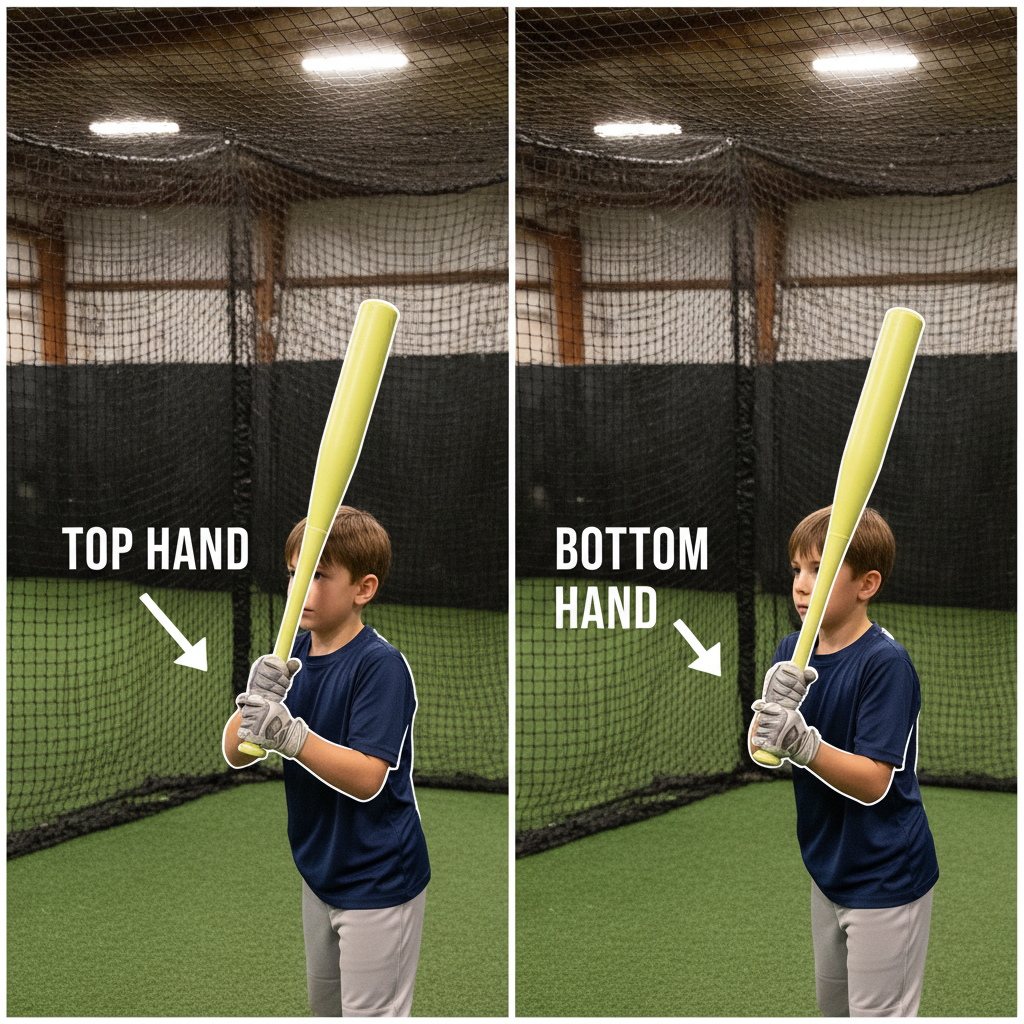
Top Hand Drill
Step 1: Grip with Top Hand Only Hold a light bat or training bat with only the top hand (right hand for right-handed hitters).
Step 2: Choke Up for Control Choke up significantly on the bat for better control and to reduce strain.
Step 3: Short, Compact Swings Take short swings off a tee, focusing on driving the palm through the ball and keeping the barrel in the zone.
Bottom Hand Drill
Step 1: Grip with Bottom Hand Only Hold the bat with only the bottom hand (left hand for right-handed hitters).
Step 2: Focus on the Pull The bottom hand initiates the swing and pulls the bat through the zone. Focus on a smooth, connected swing.
Step 3: Maintain Balance This drill is more challenging—keep movements controlled and balanced.
Drill #5: Dry Swings (Shadow Swings)
Dry swings allow hitters to focus entirely on mechanics without the distraction of hitting a ball. This is perfect for warming up, working on specific mechanical issues, or building swing repetitions.
How to Perform Dry Swings Correctly
Step 1: Set Up as Normal Take your regular batting stance as if preparing to hit.
Step 2: Visualize the Pitch Imagine a pitch coming in at a specific location. Visualization is key to making this drill effective.
Step 3: Execute Full Swing Take a complete swing with full effort, focusing on proper mechanics throughout.
Step 4: Check Your Finish Hold your finish position and evaluate your balance, hand position, and overall form.
Making Dry Swings More Effective
- Use a mirror to provide visual feedback
- Have a coach or parent watch and provide cues
- Focus on one mechanical element at a time
- Take 10-15 quality swings rather than rushing through 50 poor ones
Drill #6: Walking Tee Drill
This drill emphasizes weight transfer and helps hitters who struggle with being too static in their stance. It teaches the body to move forward into the swing.

How to Perform the Walking Tee Drill
Step 1: Start Behind the Tee Begin 3-4 steps behind your normal hitting position.
Step 2: Walk Forward Take slow, deliberate steps toward the tee, building momentum.
Step 3: Time Your Swing As your front foot plants in your normal stride position, execute your swing.
Step 4: Feel the Transfer Focus on how your weight moves from back to front through the swing.
Drill #7: High Tee Drill
This drill specifically addresses the common youth baseball problem of an uppercut swing. By forcing hitters to swing down to the ball, it promotes a more level swing path.
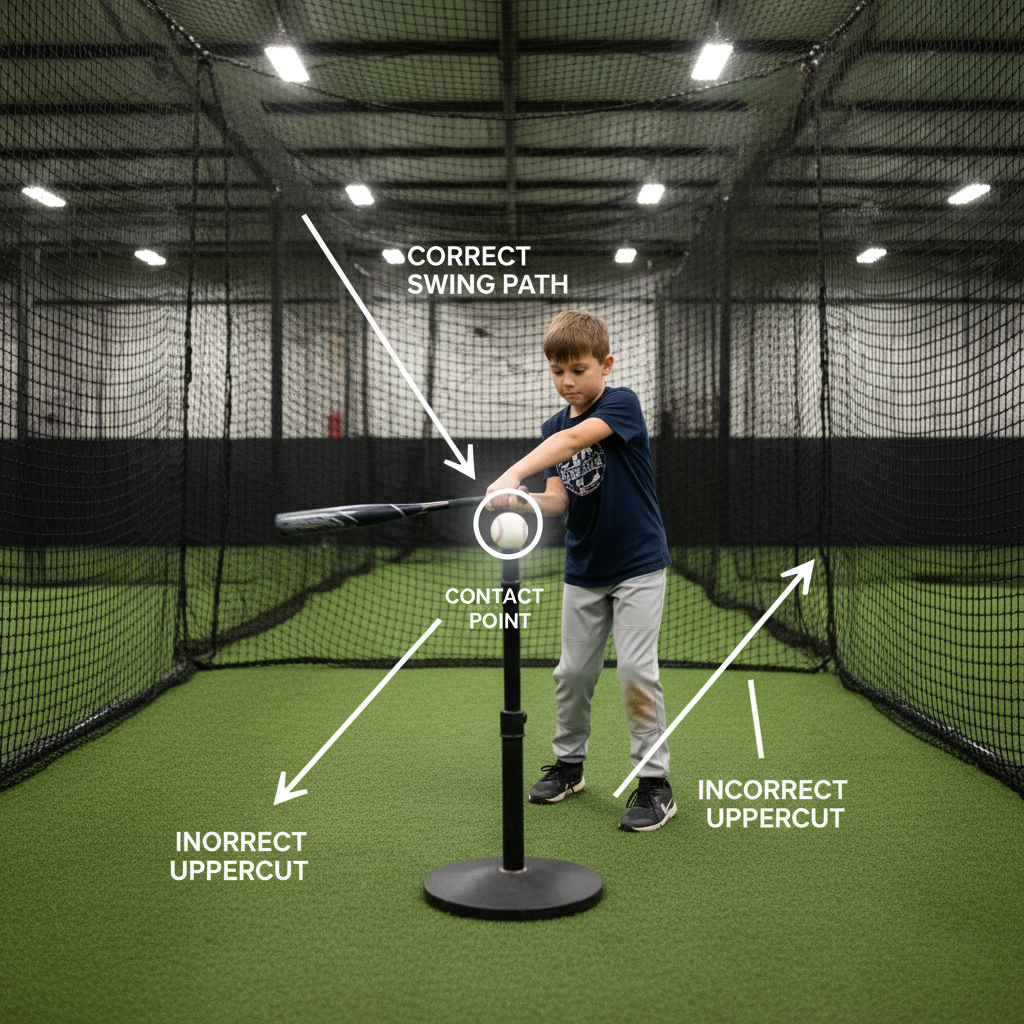
How to Perform the High Tee Drill
Step 1: Raise the Tee Set the tee at chest height or slightly higher.
Step 2: Maintain Posture Don't stand up taller—maintain your normal athletic stance.
Step 3: Swing Down Through the Ball The only way to make solid contact is to swing on a slight downward plane to the ball.
Step 4: Drive Line Drives The goal is to hit hard line drives, not grounders. If you're hitting grounders, you're swinging too steeply.
Building a Practice Routine
Now that you understand each drill, here's how to structure an effective practice session:
| Drill | Repetitions | Focus Area |
|---|---|---|
| Dry Swings | 15-20 | Warm-up, mechanics check |
| Tee Work | 25-30 | Contact point, swing path |
| Soft Toss | 20-25 | Timing, tracking |
| Front Toss | 20-25 | Pitch simulation |
| One-Hand Drills | 10 each hand | Hand separation, strength |
| Specialty Drill | 15-20 | Address specific needs |
A complete hitting practice session using this structure takes approximately 30-45 minutes and provides a comprehensive workout for developing hitters.
Common Mistakes to Avoid
As your young player works through these drills, watch for these common errors:
Rushing Through Reps: Quality always beats quantity. Ten perfect swings are worth more than fifty careless ones.
Ignoring the Tee: As mentioned earlier, tee work isn't just for beginners. Make it a consistent part of every practice.
Inconsistent Tosses: If you're the one doing soft toss or front toss, your job is to deliver consistent, hittable pitches. Practice your tosses too.
Skipping the Basics: It's tempting to jump to advanced drills, but the fundamentals must be solid first.
Conclusion: Building Better Hitters One Drill at a Time
Mastering these foundational hitting drills won't happen overnight, but consistent practice will yield results. The beauty of these exercises is their simplicity—they can be done in a backyard, at a local batting cage, or during team practice. They require minimal equipment and can be adapted for any skill level.
Remember, every great hitter started with these same basic drills. The players who eventually excel are the ones who never outgrow the fundamentals—they simply add to them.
Looking for a youth baseball club that emphasizes proper development and fundamental training? At RateMyBaseballClub.com, you can read honest, anonymous reviews from parents about clubs in your area. Find programs that focus on building skills the right way, with coaches who understand that mastering the basics is the first step to hitting success. Start your search today and give your young player the best possible foundation for their baseball journey.